Thursday, 17 July 2014

What is Nail Stamping? - A beginner's guide to Nail Stamping

In my most recent posts I've featured a video by one of my favourite nail artists on youtube - janelle, better known as elleandish

As I was talking about nail art I also mentioned nail art which some of you may have never heard of. I'll tell you everything you need to know about nail stamping so have no fear, Nina's here! 

Briefly explaining, the way nail stamping works is if you apply some nail polish on a nail plate and swipe the excess polish off with a nail scraper and press a rubber stamp on the plate which picks up the design and press the stamp on your nail to transfer the design. This is the best way I can explain but it makes much more sense to watch a video which I'll be posting one in the next 24 hours on my channel so keep your eyes peeled here and subscribe while you're over there :) 

First thing's first, you need at least four essential tools which are: 

A nail stamper There are two types that I know of so far which are single ended and double ended. 

I also categorise them by the type of material they're made from such as a matte rubber stamp or a shiny rubber stamp.

A single ended stamper only has one end and is great for beginners as you have more control of the handle and the amount of pressure you're applying to your nails. 


This is how it looks at the top and it actually came with some nail plates I bought but I had trouble using it because it didn't seem to pick up the designs oddly enough. 


This is another example of a single ended stamp which happens to look like a child's toy. I'm not really a fan of the shiny rubber stamps as I seem to have trouble with them. This also came free as a gift from an order I placed from China. 


Oddly enough the free rubber stamps above didn't seem to work for me, so most of the time I've been using my Konad rubber nail stamper which has worked wonders for me over the past few months. I highly recommend this for beginners because for some reason the stamps I received as gifts didn't work as well as the stamps I bought so make that something to keep in mind when you're thinking about the type of nail stamping tools you want to use. 


My trusty Konad double ended nail stamper has been my life saver. It picks up the designs efficiently and is very accurate. This is the small end which is useful for dark colours and small designs, you can also use it to control the accuracy of where you want to position your design on your nail: 


Here you have a big end for bigger designs. This size is commonly used for designs that take up more space on your nails and would need a large stamp to pick up the design. 

 
Finally, this double ended, shiny rubber large stamp is my most recent stamp I've been using. It's called the XL Double Sided Stamp & Scraper from MoYou London and at first I was a little bit doubtful as to whether it would stamp the designs on properly from my past experiences with shiny rubber nail stamps but to my surprise, it actually worked! 
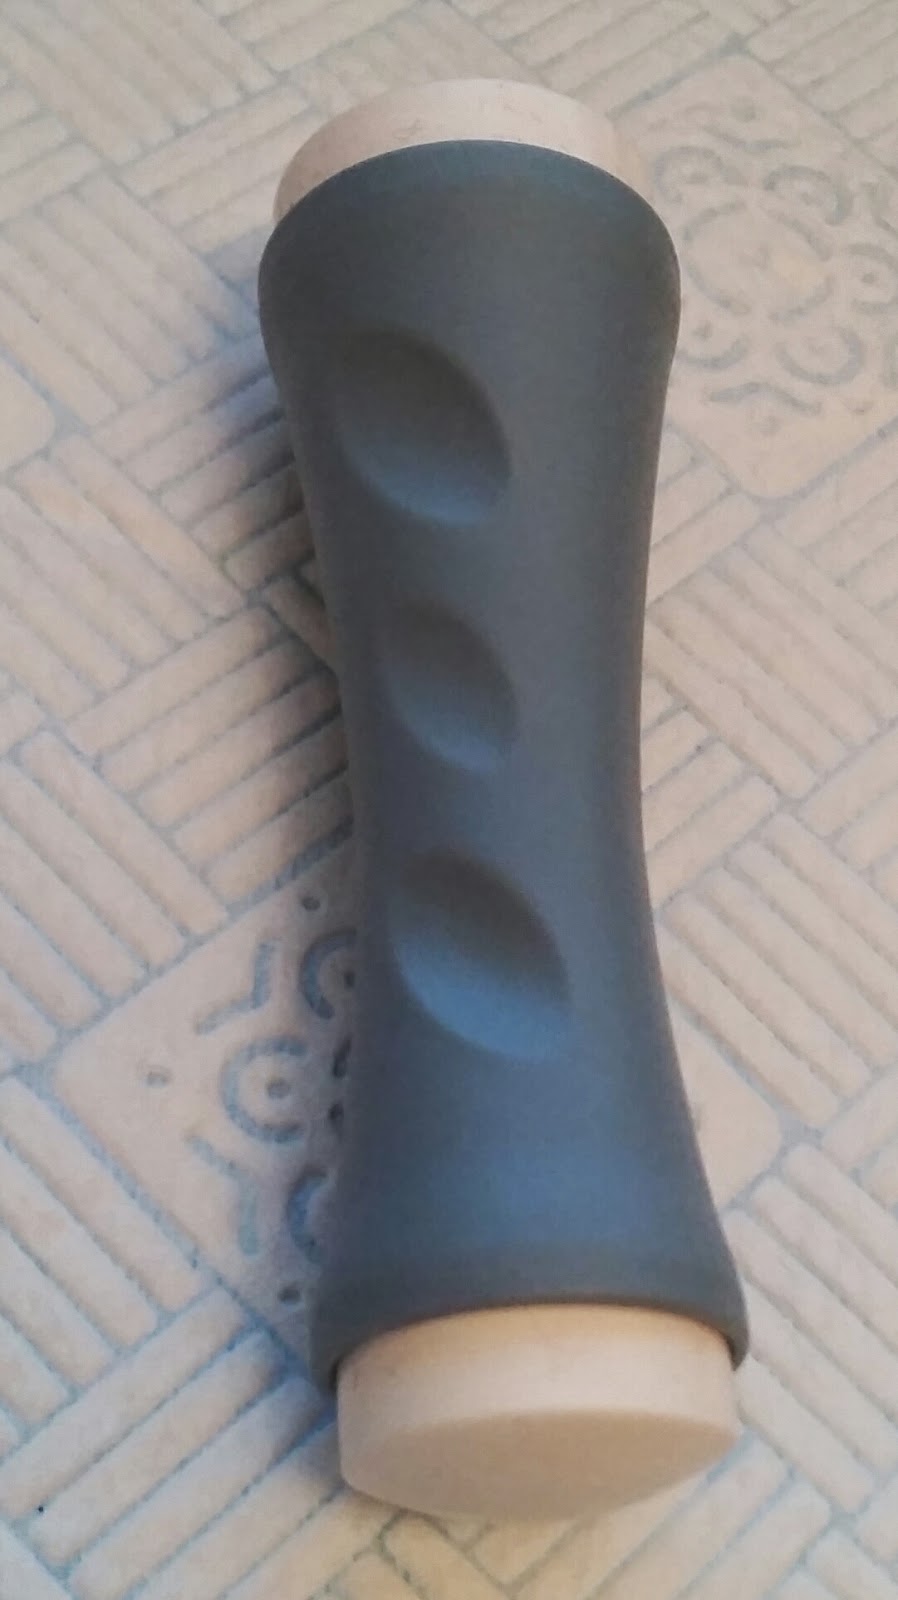

The handle is also easy to hold and you get a good grip thanks to the indents on the side of the stamp. The Konad one also has this but is much smaller than this one. 

A nail scraper - You can get either a metal or plastic scraper and what works best is a matter of opinion although they're both fine. 

I prefer plastic scrapers more because in my opinion you can press harder against the plate to scrape more excess nail polish without the worry of damaging the nail plate. I also like how you can get a cleaner swipe the very first time you scrape the nail polish out of the way with a plastic nail scraper and best of all it won't go rusty so it saves you from buying another scraper which also saves you money in the long run. 

The picture of the one below came with my MoYou London XL Double Sided Stamp & Scraper. I have to say that the handle is quite spacious which gives you the advantage of better control when you're scraping and as a result more accuracy with less effort.  


A nail stamping plate - You can get these from various websites depending on what you want. If you're new to nail stamping I recommend buying small nail plates such as the Cheeky set of 26 nail art plates which is what I started with. Unfortunately they've discontinued selling it on Amazon but I'm just mentioning it anyway to give you an example of what you can buy if you're new to nail stamping and want to experiment with different designs without spending too much money.

Nail polish remover - This is absolutely essential because if you make a mistake you'll have to clean it up and when you're finished you need to make sure your equipment is clean for the next use. I recommend using a cheap nail polish remover to clean your equipment but a nourishing formula for removing nail polish from your nails. This ensures you're reducing if not avoiding any damage to your nails while you're painting and stamping them. 

Useful tip - Make sure the polishes you're using can withstand the pressure of the rubber stamp before attempting to use them for stamping. It saves you time and money knowing that your nail polish won't dent or smudge when you're using your stamp. OPI, Bourjois and Collection are my top personal recommendations. 


Wednesday, 9 July 2014

My blog - The new look

Just a moment ago I spontaneously bought this blogger template and to my surprise it looks great! 

I really took a risk here and thought that if this doesn't work out I'll have wasted money on something that doesn't even work! - I say that because at first I had absolutely no clue how to install this thing. I managed to figure it out in the end though but the problem is that I can't even use the buttons on the navigation bar arrggghh. I knew how to change their names but as far as clicking on them I have no idea. 

The nice thing about it is that it gives my blog a fresh new look and something nice to look at. Plus I really like the popular post tab on the right side. I'm not a techy person but as far as I can tell I'm just about managing to cope. 

See in my life, things just happen unexpectedly and sometimes it's a good thing but sometimes it isn't. I'm really hoping you guys like the new layout and that you wish me luck as I venture into the world of technical blogging *techy*. 

It's 1am in the morning so I'm gonna shoot off to bed now guys. Sweet dreams! 

Love Nina xXx

How to make purple nail polish

It all started when I was in the mood for purple nail polish but knew I had to stop spending (as I am a shop-o-holic). I really thought there was no hope until it dawned on me that if I managed to make purple using the colours from the Ciate Nail Lab, I could just as easily create my own shade of purple using the nail polishes I already have. 

When I realised that mixing blue and red made purple, I looked for all the red and blue shades I had that weren't Ciate just to see how it would turn out. I also threw in a bit of gold and silver for extra dimension and to see what it would turn out like.

I decided to make a video about four easy shades of purple you can make using four shades of nail polish. As you go along you can add more or less of the colours depending on the final effect you'd like. You can see more of what I did in the video below: 


For example if you wanted to make a dark purple you would need a dark blue as it's the most dominant colour which will affect how your final shade of purple will look like when you've finished mixing the colours together. If you wanted a mid-toned purple you would need a lighter shade of blue and to make it even lighter you can add some white nail polish or maybe a light pink possibly cream coloured polish to lighten the colour up. 

You can also play around with the shades of red you're using but I wouldn't know how it would turn out because I only had one shade of red on hand unfortunately. If you want to try mixing your nail polishes together you can always try and make your own shade altering the type of red you're using and why not leave a comment below and let me know what happened? 

Thank you so much for reading. I hope this post was helpful and that you have more knowledge of how to mix your own nail polish colours to create different shades of purple. 

Happy mixing! 

Nina xXx

How to make your nails stronger

So lately I've been considering having a hand model for me to film a nail tutorial video. I asked my good friend Laura whether she'd be up for it and I was also thinking about the preparation of this video. I was thinking it would be a good idea to strengthen her nails beforehand so I asked her to soak her nails in Olive oil for at least ten minutes everyday for a week. 

This seemed like a decent and almost effortless suggestion until I decided to also make her an oil chart as a reminder of her progress so far. I posted it on my social media so that people can also take part in this mini challenge and let me know whether they felt a difference. Hell, even I'm doing this challenge at the moment! It's so easy to do and you don't even have to use olive oil, it can be any non-harmful or non-toxic oil you wish to use. 

I've heard a lot of buzz about how olive really helps to repair your nails but I'm not actually sure whether it really works so to de-bunk this myth I'm going to have to find out for myself. 

If you want to take part in this mini challenge too all you have to do is print or save my chart for my mini olive oil challenge and just let me know how it's working out for you in the comments below. 


I wish you the best of luck and if you want to see more of me don't forget to come on over to my youtube channel and subscribe while you're there. 

Lots of love

Nina xXx 

Monday, 23 June 2014

Pinterest for your business

Lately I've been really addicted to Pinterest. The moment I downloaded the app I fell in love with it! 

I never knew that you can also make money from it and actually showcase your business on it! *shocked face* 

If you've never heard of Pinterest before it's a website and app where you have a virtual pinning board to pin whatever kind of pictures, videos or links that you like and share them on your profile. It's becoming popular fast and apparently it's the fourth largest website after facebook and twitter. 

It's highly addictive and I just can't get enough. You see so many interesting things such as tutorials, ideas, inspiration and best of all an easy place to shop. 

I'm thinking about opening a shop of my very own and my main aim is to engage with more people and let them know that my brand exists. I love seeing comments about any suggestions, thoughts, feelings or questions people may have and I think Pinterest would be an amazing platform to do so. 

I'm also a huge fan of Melanie Duncan and I find her YouTube videos are helpful too. She really opened up the world of Pinterest to me and made me see it as more than just a picture sharing website. 

I'm currently taking her online course called the Power of Pinning which you can see here. It's an online course for aspiring business owners who want to use Pinterest as a platform to reach more clients. I just bought it last night and I have to say that it looks great so far. The content is well organised into modules and I'm liking it so far because: 


  • It's easy to navigate and find what you want
  • You can access it even when you're not on your computer through your phone or tablet
  • The video lessons are short and concise
  • The language is easy to understand
Below is a print screen of what I see on my computer and I love the clean layout of the site. 


And once you open one of the modules you'll see a video and a sidebar on the left with the rest of the videos from that module. Again, I'm a big fan of the layout so here's a print screen from my computer: 


Also in the bonus section here you can see a Pinterest and Facebook report which I haven't read yet but I'll let you know how it's going so keep an eye out for a future post about this course.


So that's all I got for you guys today so please wish me luck on this course and if you're an aspiring business owner who wants to get more exposure or interaction with your business feel free to hop on over to Melanie Duncan's website here and buy the power of pinning. 

I'd also love to hear how you're getting on with it so please comment below or contact me on my social media if you have any thoughts, feelings or questions about this course and I shall see you next post! 

My social media: 

Facebook: https://www.facebook.com/MlleNinaBeauty
Twitter: https://twitter.com/MlleNinaBeauty
Tumblr: http://mlleninabeauty.tumblr.com/
Instagam: http://instagram.com/mlleninabeauty

Pinterest: gb.pinterest.com/mlleninabeauty/

Nina xXx

Nail Art On A Budget

If you've been following me on my social media you can tell that I'm a huge fan of nail art. 

There's just something about it that makes you look more fashionable and really compliments an outfit. 

The problem is that some people think nail art is too complicated and therefore don't bother with it. 

But in this video I'll be teaching you how you can get professional looking nail art without the salon price tag. 


Before we start 

To benefit from your nail polish you have to consider what your needs are first. A couple of things to think about before making any decisions are:

How often do you paint your nails? Every day/week/month? 

If you're painting your nails every day you don't need to waste money on a long lasting formula as it would be pointless unless you're thinking about keeping your nail polish on for at least a couple of days. 

Painting your nails weekly or monthly is a different case so you would want that staying power if you were planning on keeping your nail polish on for more a week or more. 

Gel nail polishes would be great if you were thinking about keeping your nail polish on for up to three weeks. You would need to consider buying a UV lamp and buying gel formulas to support your needs if you chose to do this. This considerably cuts the cost of paying to get gel nail polish done in a salon especially if you'll be doing it regularly. Also think about things like replacing the bulbs in your UV lamp so that you can maintain it and the particular types of nail polishes you'll have to buy to use your lamp with.

How much are you willing to spend? 

One of the most important questions is how much are you prepared to spend on a nail polish? 

This is because if you're after quality nail polish that will last you long, the price is important because it's mostly the more expensive nail polishes that last the longest. Although this isn't the case sometimes just be aware of what formulas work for you when you know how often you'll be doing your nails. 

The pricier nail polishes typically have smoother formulas. I've found that my OPI nail polishes aren't too runny and glide on beautifully. Whereas my nail polishes from the pound store are quite thin, runny and dent easily even when fully dried. Not a good look. 

You can even buy drugstore nail polishes depending on what brand it is but it's a matter of trial and error. Take mental notes of what kind of nail polishes suit your needs best.

Tip: Make sure you use a good base and top coat. The base coat protects your nails from becoming discoloured, weak, and dry from the harsh nail polishes and the top coat prevents the nail polish from chipping, makes it last longer and gives a glossy finish. 

Tip 2: If you have weak nails or are worried about getting damaged nails use a repairing or strengthening formula as a base coat. You can even use it as a top coat if you want. This also helps to save you money from buying a normal base and top coat.  

How do you want your nail polish to look like?

  • Do you simply want a bit of colour to your nails instead of having them bland? 
In this case you are colour orientated and you don't want anything complicated just a few coats of nail polish. 
  • Do you like having designs on your nails? 
If so, you are an artistic person who likes creative designs and need a nail polish that is strong enough to withstand nail stamps or can be layered easily. You have two options:
  • If you're good at drawing designs or are willing to take the time to draw on your nails you can use nail art brushes such as this set here which I bought recently: 

You can even use dotting/marbling tools such as these ones in the picture below. 


As you can see the marbling tools have different tip sizes as some look bigger than the other. This gives you more flexibility when drawing on your nails (as shown in the video below). 


These types of tools are used for creating dots,marbles and lines to create different looks like flowers, stripes, lines and much more. You can make the designs as simple or as complicated as you want. Here are some examples of what you can do:


Above is a basic design which you can adopt if you're a beginner wanting to experiment with the dotting tools. 

OR 

  • If you're not good at drawing like me or don't have time to paint designs on your nails but still want to have intricate designs, you can use nail stamps. They're a life saver and save you so much time and effort. To learn more about nail stamping watch this video below: 


As an example: 

  • I personally get bored of having the same nail polish on for more than a week so I know that I'll be painting my nails once a week or twice if it chips. However, I also want my nail polish to stay in place for as long as it can in case I don't manage to do it again if I don't have time so in this case I'll need it to last long
  • Most of the time I do nail stamping because I love intricate designs but I'm not actually good at drawing the designs on myself so the nail polish needs to be strong enough to handle the pressure of the nail stamp. 
  • I don't want to damage my nails in the process either and want them to be strong. What I need is: 
    • A nail strengthener (which can also be used as a base coat) to protect my nails and prevent chipping or dry and brittle nails. 
    • Good quality top coat to make my nail polish last longer. 


Recommended websites 

If you're stuck or wondering what some good websites are to buy nail polishes from here are a few I've used and my thoughts on them: 

Note: I live in the UK so make sure you find a store that delivers to your country before making a purchase.

Ciate - http://www.ciate.co.uk/

In my last blog post which you can see here I reviewed the Ciate Nail Lab and Mini Paint Palette. I thought their nail polishes were a bit runny and thin but made a good background colour for my nail stamping. They last up to a week which is great and you can build the colours up.

OPI http://www.opiuk.com/

My number one choice. I have an addiction and attachment with this brand because their colour range is wide, their formulas aren't too thin and perfect for nail stamping, they dry quick and last for a week. Most of my nail polishes are OPI and I can't find any other brand that beats them. 

Marks and Spencer http://www.marksandspencer.com/quick-dry-nail-polish-8ml/p/p22132489

This seems a bit unexpected seeing as people mainly shop there for clothes but one day I saw one of their Limited collection nail polishes for sale and bought one not knowing what to expect. I was impressed at how good it was and loved it! Lasted for a week and works great with my nail stamps. The shade I bought isn't on their list because it was a while ago but it's worth the purchase. 

Collection  

This is available in your local drug store and I tried the 60 seconds hot looks nail polish which looks like this: 


This lasts for a week too and isn't all that expensive either. A great buy for a nail explorer such as myself and anyone else who doesn't want to spend a fortune. 
I bought mine from Superdrug and I'll be using this in a future video of mine on my Youtube channel so be sure to keep an eye out and subscribe if you haven't already! 
I post every week and I appreciate every single one of you *big hug* 

Bourjois

Widely available again in any drug store and lasts a week. I particularly love the metallic colours especially when I'm using my nail stamp for stars or flowers and would recommend the gold and silver colours. 

Nina Ultra Pro 

I've only got one shade of this which is in Orange Flame. This is a neon orange colour which I think works well against a navy blue or black when I'm using my nail stamps. 

Nail plates


I first saw these on Janelle's channel on YouTube and it was one of their mermaid plates from their fairy tale collection (which I can't seem to find for some reason) but I bought the Explorer Plate in number 17 because I had my eyes set on plate number 2 but wanted more variety to choose from. 

I'm seriously thinking about buying more plates so I'll have to do a future blog post about this because these plates are too good to miss out on! They're £5 each but don't let that put you off because you have a variety of designs to choose from and they make use of the space on their XL plates which I really want to try. I'm such a huge fan after my first purchase and their delivery service is excellent too! 

So that's all for this blog post I hope I've helped you debunk any myths you've heard about how expensive or difficult nail art can be. 

If you have any questions or thoughts please feel free to comment below and I'll be sure to read them :) 

Nina xXx


Saturday, 21 June 2014

Ciate Nail Lab and Mini Paint Palette

I'm an absolute nail addict and one day one of my friends mentioned Ciate nail polishes. This was a brand I'd never heard of which lead on to my curiosity of who they are. Having looked at their website my friend suggested I buy the Ciate Nail Lab because the fact I love to make things and that I love painting my nails strongly lead me on to buying it. 

Last week I posted this video where I did a quick tour of what's inside the Ciate Nail Lab


I also bought the Ciate base coat called "underwear" and their speed coat which is their fast drying top coat. I'm a nosey person so I wanted to see what their nail polishes were like and went ahead with the Mini Paint Palette which is a small collection of their mini nail polish shades. 


Another thing that took my interest was their Chalkboard Manicure because I'd never seen anything quite like it. I only saw this after I bought the Nail Lab and Mini Paint Palette so I decided to treat myself to it at some other point. 


Quick note: 

If your order is over £40 you get free delivery. Mine came to almost £50 so it wasn't that bad (plus there was a sale) so it was well worth it. 

This is how the Nail Lab looks like at the front. It has three drawers (which I will show you as you scroll down on this page) and each drawer has different tools you can use to create your own nail polish shades.


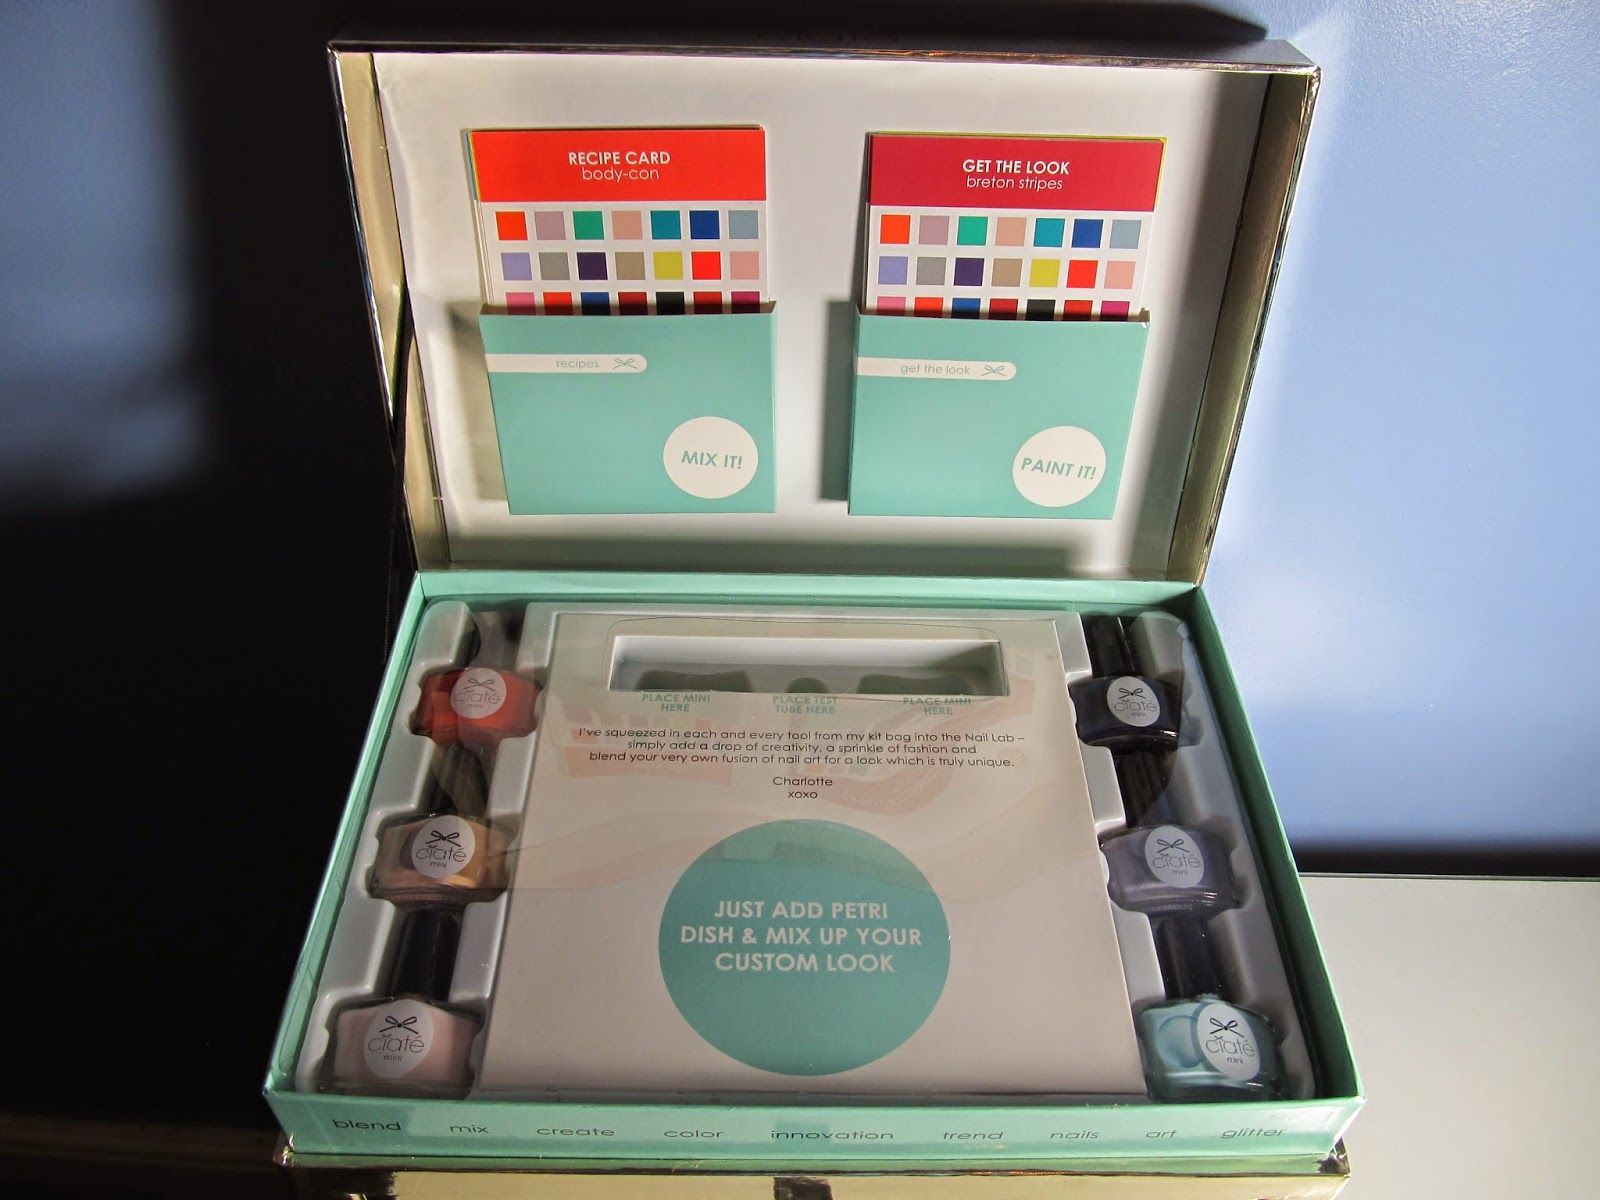
The top drawer actually opens up and has some instruction cards that you can follow to create some rather interesting looks. 


It also has six nail polishes with two nail polish slots to hold your nail polish bottles upright and a round tube slot in the middle. In the green round area you simply place your plastic petri dish on it (as directed) and use it to mix your nail polishes on it so you can test out what kind of shades you can make.


Below: Side views of the kit from the outside 


 Even the back of the box has a paint palette which I think comes in handy if you'd like an idea or some inspiration on the different colours you can make. 


One thing that surprised me a little bit here are that there are only two empty bottles that you can use to put your own nail polishes in and the rest are top coats. I'm not sure why this is but if you're thinking about buying a top coat from their website and bought this kit there's no need to (which I think is good in a way but it would be better if there were only one or two top coats and the rest of the bottles can be for your creations).


This second drawer has some glitter and two empty bottles alongside it so that you can mix the glitter if you wish with the small funnel provided in the last drawer.


Below: A closer view of the glitters


 In this last drawer you get some nail tools on the left and two tubes for you to mix glitters (if you don't use the bottles for it). Your trusty petri dish on the bottom right and six metal nail polish balls so that you can mix your nail polish colours while they're in the bottle. You can use one or two but I like using two to get a better mix. 


In my opinion this kit could have been better if they didn't give you the cosmetic sponges because it's so widely available although I understand that you might want to use it for the ombre looks it still didn't seem worth it. Not a big deal but just a minor adjustment they could have made. 

Quick note: Don't use nail polish remover to remove nail polish from the petri dish. I think it could have been glass instead of plastic because once I finished mixing my nail polishes I ruined the bottom part of the dish with nail polish remover. 


These are all the nail art tools that were on the left side of this kit and I think what they give is reasonable but just make sure to take good care of these tools for the best long lasting results. 


Above: A close up of the tools in this kit

And now for the verdict 

Pros 

  • The designs on the nail cards are pretty simple to do and the instructions are easy to follow so it would suit a beginner at nail art. 
  • The layout of the drawers is organised and doesn't look too cluttered.
  •  A good amount of glitter is given which allows you to create as many combinations as possible. 
  • Top coat is included in the kit so that you can seal your designs. 
  • On the top drawer there is a designated area to mix your nail polishes and position your nail polish bottles and tubes. This avoids spillages and helps to be more organised when creating your nail polishes. 


Cons

  • This kit was originally £65 and I bought it on sale for £25 so if you're not willing to pay the full price it can be expensive.
  • The petri dish is plastic and can corrode if you put nail polish remover on it so avoid doing this if you don't want to ruin your dish. I did this and was quite surprised to see it got damaged. 
  • Some of the resources in this kit I feel are unnecessary such as the nail file and the make up sponges because they're cheap and easily accessible elsewhere such as a drug store, supermarket or even a pound shop. 


Thoughts

  • At least four extra empty bottles could have been given instead of suspension top coats (which I don't understand why there are so many) as I think it would give people more of a chance to create their own nail polishes.
  • More metal mixing balls could have been given as I don't think six is enough. Eight would have been ideal.   
  • I think a glass petri dish or any other materials that won't get damaged by nail polish remover would be hugely beneficial instead of a plastic one.  
  • Instead of a metal cuticle pusher a plastic one would have been better as it's softer on the nail and not too harsh. 
  • A double ended nail art brush would have saved space seeing as the other two tools are double ended as well. 
  • A colour wheel would have been a good idea so that people can get an idea of what kind of colours they can achieve if they mix certain colours together. 
  • A base coat would have been useful to protect and avoid damage to the nails. 

Mini Paint Palette

On the Ciate website I noticed that they didn't show the specific nail polish shades that you get in their Mini Paint Palette set so I'm going to show you what you get in this kit. 

You can also watch my video that I made below this post where I give you a demonstration of how each colour looks on your nails. 
Subscribe to my channel while you're over there :)


I thought the colours could have been more limited edition and the reason I say this is because I found three of the same shades from the Nail Lab which made me feel like I bought the same thing twice. 


The three shades that the Nail Lab and the Mini Paint Palette have in common are Mistress (the bright red shade on the right), Power Dressing (the dark blue shade next to Mistress) and Amazing Gracie (the light pink polish above  Power Dressing).


Pros 

  • The polish is long lasting up to a week. Always make sure to use a good base and top coat to avoid damaging the nails and prolong your nail polish. 
I used the Ciate underwear" and their speed coat which gives great results. 
  • The formula is smooth and glides on beautifully.


Cons

  • Almost half of the kit has transparent glitter nail polishes which doesn't give the opportunity to try more colours in such a small kit. 


Thoughts

  • The colours could have been more varied as there are three shades of red including the glitter polish and not enough of a distance between the colours. I feel that green, yellow or purple would have been a nice twist. 

So overall I'd say both of these kits would benefit anyone who loves good quality nail polishes and is a nail maniac (like I am). I think the light colours are really versatile with nail stamps because I stamp my nails a lot. 

For those of you who've never heard of nail stamps before take a look at this video below: 


In the next 24 hours I'll be posting my new video based on this blog post so if you want to see it come on over to my channel and subscribe while you're over there :)


If you have any questions, thoughts or comments leave a comment below or contact me 
on my social media:

Facebook: https://www.facebook.com/MlleNinaBeauty
Twitter: https://twitter.com/MlleNinaBeauty
Tumblr: http://mlleninabeauty.tumblr.com/
Instagam: http://instagram.com/mlleninabeauty
Pinterest: gb.pinterest.com/mlleninabeauty/

Love Nina xXXx